Outlook Import Software Instructions
- Outlook Import – Step by step description of eml to Outlook importing procedure or how to move eml and msg files into MS Outlook.
- Outlook Export – Description of Outlook data extraction procedure, how to export Outlook contacts, emails, calendar, notes, attachments and other items.
- Outlook Recovery – How to repair damaged OST or PST file, convert OST to PST format.
EML files transfer with Outlook Import Wizard
With the EML to Outlook Converter (free trial available), transferring emails is quick and straightforward. This Outlook import tool uses a multi-step wizard interface for ease of use. Importing EML files to Outlook involves selecting the destination – either a PST file or your current Outlook profile, including password-protected ones. Next, choose the source folder containing your .eml or .msg files. The software scans the folder structure and displays all compatible files, preselected for import (modifiable by the user). After clicking Start, you’ll choose the destination folder, and the converter begins creating folders and importing emails. A detailed log and error report are generated for review and troubleshooting.
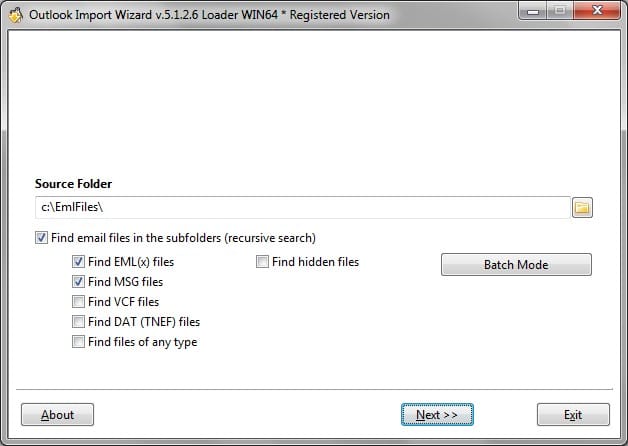
Selecting the source folder
At the first step the user should choose the source folder which contains files of .eml, .emlx and .msg formats. The source folder may contain the multi-level nested sub-folders structure additionally. If you wish to import e-mails and folders structure, please prepare it previously. Usually it is the root directory with sub-folders structure of any level of hierarchy. You can specify additional options that will be used by Outlook Import Wizard during the files searching and folders structure analysis. The first option allows program to find .eml and .msg files over the whole sub-folder levels recursively. The second option can be selected to filter .eml or .msg files. The third option enables the search of the hidden files which allows to find emails while migrating from Apple Mail application.
Go to Top
Searching of EML and PST files – sub-folders structure analysing
Outlook Import Wizard performs the scan of sub-folders structure, it will take some time to find all e-mails to be imported, necessary time will depend on files quantity. User can stop the searching process by pressing the Stop Search button. If you wish to re-run the analyze, you should return on step back by pressing Back button, then press the Next button again.
Choose Files to be Imported
The program displays e-mail files including the full path and they are selected (checked) by default. Some files which should not be imported can be deselected. Go to Top
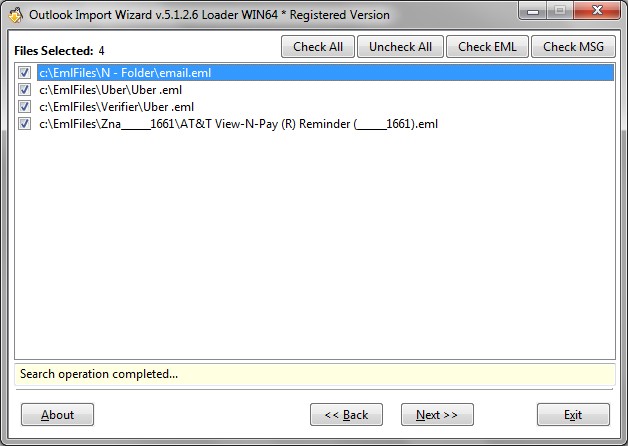
Program performs the scan of folders structure and e-mail files search.
Configure Processing Options
Outlook Import Wizard equipped with a wide range of options and filters that allow you to fine-tune the parameters before start the messages importing or conversion. If you are not sure what option is necessary you may use the predefined options (presets). Read about Outlook Import Wizard options.
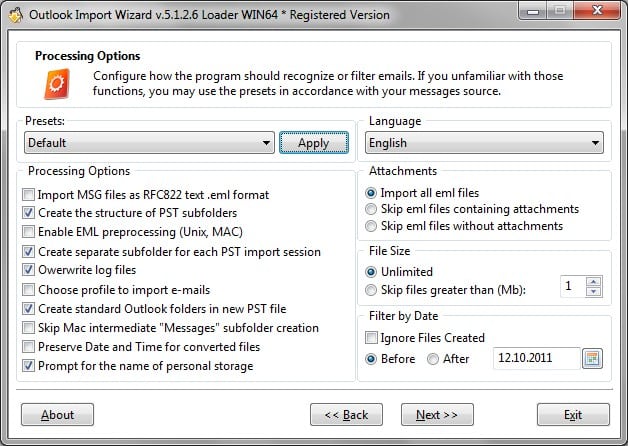
Email Processing Options and Filters
Selecting destination storage
The user can choose destination storage where eml and msg files should be imported. The current Outlook storage is selected by default. If the storage is encrypted, the password will be prompted automatically. Go to Top
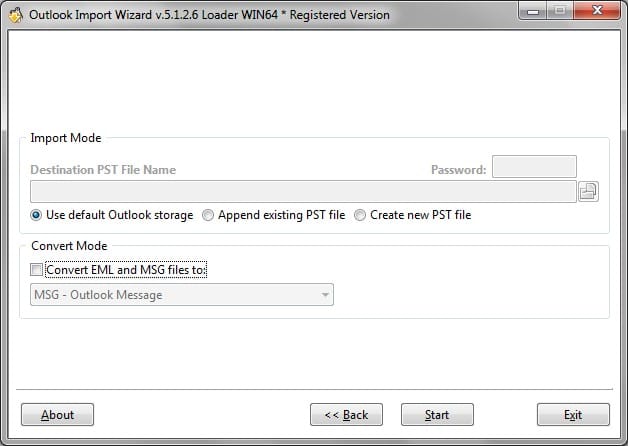
Destination storage – Default Outlook Storage selected.
To select the orphaned PST file, you should enable the appropriate option and use the browse button to select the PST file. Note: The PST file should be placed to the write enabled location. In case if the PST file protected with the password, please specify the correct password in the special field.
Importing of EML and MSG files into Microsoft Outlook
At the last stage the program performs the importing. The user will be prompted to enter the correct password in case if the default Outlook storage was selected and it is password protected. Outlook Import Wizard will open the connection to Outlook and ask to select the destination folder in Outlook folders structure. Process will start when the user confirm the root folder choose. Note: the Inbox will be chosen by default if no folder will be selected by user. Go to Top
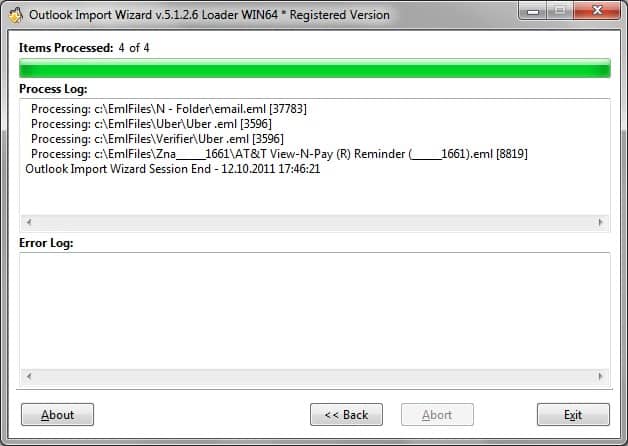
Processing Log – User can inspect the processing and error logs.
At the end of processing the user can inspect the error and processing logs in order to perform additional steps if some messages were not imported. The Outlook Import Wizard instruction describes the working of registered version. Trial version is limited by messages quantity and contains some trial reminders and other demo functions. To remove all restrictions the program should be registered with purchased license code.